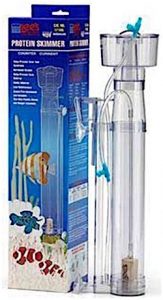
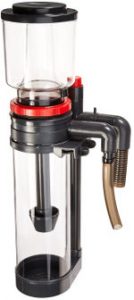
Protein skimmers are aquarium essentials. They remove organic wastes that would otherwise turn into ammonia, nitrite, and nitrate, along with excess proteins, metals, and phosphates. Without them you can expect to see far more hair algae and excessive bristle worms.
Protein skimmers function by forming small bubbles in a reaction chamber. These bubbles rise, and in a process called absorption, propel waste nutrients to the surface of the chamber. Here, the waste is taken out of the water column and contained at the top of the protein skimmer.
Protein skimmers are more effective than mechanical filtration found in filters as they remove waste from the tank before it has the chance to break down. Taking out organic waste greatly reduces aggressive algae growth, and nitrate buildup.
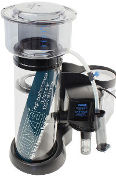
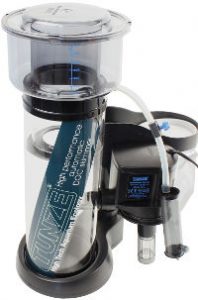
Tunze DOC Protein Skimmer
| Tank Size | Noise Level | Longevity | Price | Rating |
| Up to 150 Gallons | Low | 5+ Years | Medium-low | 8/10 |
Tunze has always been one of my favorite brands. Their equipment is solid, has a few surprisingly useful features and always runs super quiet. While the body is really big, the Tunze DOC Skimmer blows its competition out of the water with amazing features. The only drawback is its large size. Be sure you can fit this skimmer in your tank before you order it.
Dimensions
- 9410: 9.8″ x 7.0″ x 16.3″
Features
- A removable post filter, which has a size of 300 micrometers.
- A large skimmate head and drain valve means you won’t need to put effort into emptying the cup each day.
- While an adjusting tube is included, no adjustments are needed to begin producing skimmate
- A unique design allows the Tunze DOC to shut off automatically if it is going to overflow.
- The large rubber foot reduces any vibration noise, making the skimmer dead silent.
- Runs using only 15 Watts.
The biggest complaints of any protein skimmer is always the overflowing, difficulty in fine tuning for skimmate and just being a big hassle to work with overall. The Tunze DOC has none of these issues and is by far the easiest to work with skimmer available. If it came pre assembled you could actually just put it in the sump and forget you had it, unlike other skimmers that require adjustment over a few days for the perfect foam.
Set Up
The included manual is actually very useful. Not only does it cover assembly but even many of the most common issues people will have with their protein skimmers. You can find it at their site Here
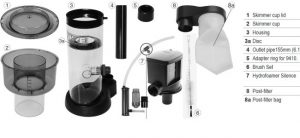
- 1. Screw the hydrofoamer silence on to the skimmer. Be sure not to make it too tight.
- 2. Attach the silicone hose form the air connection outlet of the skimmer and hydrofoamer.
- 3. Attach the adapter ring and post filter onto the black PVC outlet pipe.
- 4. Place the Skimmate cup on top of the skimmer
- 5. Mount the post filter to the outlet pipe and turn towards the skimmer until it is tight.
- 6. Rinse off the filter bag and place it into the post filter
Adjusting
While the Tunze DOC series protein skimmer should adjust itself automatically, it does allow you to manually adjust it. This is done by raising or lowering the adapter ring, shown above as 5. This will adjust the level of water inside the skimmer. The higher the adapter ring the wetter and more dense the foam will be. This can sometimes help make a better skimmate but it can also bring more water into the collection cup.
Remember that all skimmers will take a few days to break in. The self adjusting Tunze is no exception. During this time it may collect too much water in the collection cup, however it cannot over flow. If it starts to overflow the water will fall into a part of the skimmer that sense the overflowing water and shuts off the skimmer.
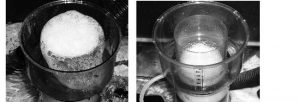
Troubleshooting the Tunze
If the foam does not reach the top even after this break in period it is likely that:
- A. The tank is new and does not have enough nutrients to form a proper skimmate
- B. The tank has been fed recently, which affects the water tension and reduces the foam level
- C. The water level is too low for the skimmer, which can be remedied by moving the adapter ring.
- D. The water is too high, tripping the anti overflowing system. This is also remedied with the adapter ring.
- E. The skimmer is in a zone with too strong of a current.
Warranty & Lifetime
Tunze is one of the only skimmer manufacturers to offer a two year warranty on the entire protein skimmer. Every other skimmer will usually only have a 1 year warranty, some specified to the water pump only. Additionally the solid construction and well made water pump give the Tunze DOC the longest average lifetime, often lasting well over five years. This should be no surprise as their powerheads, which rely on a similar impeller to move water, often last over a decade.
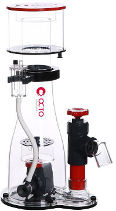
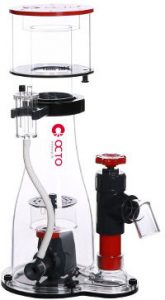
Reef Octopus S Series
| Tank Size | Noise Level | Longevity | Price | Rating |
| up to 250 Gallons | Low | 5+ Years | Medium-high | 8/10 |
The Reef Octopus, also known as the Coralvue, is probably the most well known skimmer out there. It performs its job admirably and has for a long time, building trust with aquarists across the globe. That trust is what always puts the octopus at the top of most peoples skimmer recommendations. I however am going for the skimmer itself, not what used to be the best. That being said the Reef Octopus still manages to get second place.
Dimensions
- 152-S: 10.4″W x 8.1″L x 20.7″H
The body is smaller than the Tunze DOC but larger than the next two skimmers.
Setting up The Reef Octopus
The Reef Octopus is very easy to set up but it does have a lot of small pieces to work with. Be sure to make a clean area where you can sort everything out before you begin assembling the skimmer. Everything connects exactly where the diagram below shows.
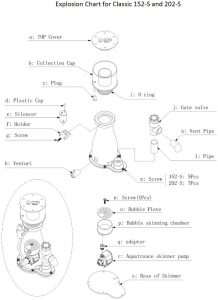
A lot of the components will be lose in the box, grouped together in a few bags with a Styrofoam casing for the skimmers body. You should begin by taking everything out of their bags, rinsing them off and then organizing them. You will also need to unscrew the base of the skimmer from the body. The pieces are all fairly easy to identify, making setting up easy. Just take your time so nothing gets mixed up.
Adjusting
Remember that all skimmers should take a few days to break in. During this time there is no reason to try and fine tune the skimmers bubble level. You should only try to make the bubbles not come close to overflowing.
The Reef Octopus uses a gate valve to adjust the bubble’s level.
- How to adjust the amount of bubbles
- Turn the gate valve counter clockwise to increase the bubbles
- Turn the gate valve clockwise to decrease the bubbles
Lifetime & Warranty
The Ref Octopus is sold with a standard 1 year warranty. The pump, which is the only component that can break, is pretty durable and should last you over 5 years when well cared for. To care for the pump you should take it out of the skimmer and disassemble it until you can clean the impeller.
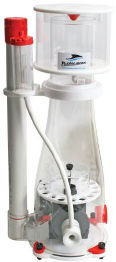
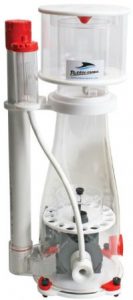
Bubble Magus Curve
| Tank Size | Noise Level | Longevity | Price | Rating |
| up to 250 Gallons | Low | 5+ Years | Medium | 8/10 |
I would say if the Reef Octopus is not the most well known protein skimmer, than the Bubble Magus Curve is. It’s body is made a lot like the octopus but the inside has a different take on the bubble production. Combine this with their custom made skimmer pump, easier to use adjustment tube and lower price, it’s no wonder so many people look to the Bubble Magus when picking out strong protein skimmers.
- Features
- The pinwheel needle with venturi inlet combo creates an extremely dense foam, which does an amazing job at trapping skimmate with minimal water waste.
- The powerful wineglass structure makes the bubble magus highly durable while keeping its volume down.
- The smaller body means less bubbles are required, which puts less stress on the water pump and skimmer.
- The water output tube on the left of the skimmer makes adjusting the bubbles/skimmer a breeze
- The compact design allows the bubble magus fit where other skimmers won’t.
- The padded rubber feet make this a silent protein skimmer
- Dimensions
- Curve 5: 7.28″W x 7.08″L x 18.5″H
- Curve 7: 10.8″W x 10.5″L x 21″H
Set-up
One of the faults with this skimmer is their poor user manual. It gives you some directions, but the English isn’t quite right. This makes it a bit hard to put together without online help.
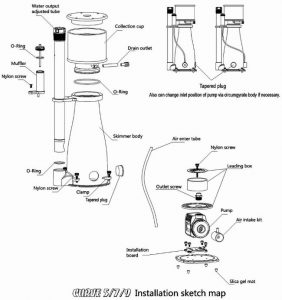
Like most products, the Bubble magus comes in several bags and requires assembly. Here’s my quick set-up guide for the Bubble Magus Curve:
- 1. Take out all the components, including the body and give them a quick rinse. This removes any dusts and chemicals that may be clinging onto the skimmer.
- 2. Loosen the four nylon screws on the base of the skimmer and remove the base.
- 3. Remove the small white clip on the base of installation board. This will be used to hold the cord of the skimmer pump in place.
- 4. Slide the water pump on the installation board and reattach the white rubber piece with the cord under it.
- 5. Place the bottom part of the leading box/bubble chamber on the water pump, connecting it with the outlet screw.
- 6. Finally place the rest of the lead box on the top, with the hole side of the lead box on the side away from the pumps outlet. Fasten the box together with the long nylon screw.
- 7. Re-attach the base of the skimmer with the pump installed using the 4 screws you removed in step 1 or 2.
- 8. Connect the tapered plug to the front of the skimmer and connect the muffler near the skimmate cup. It goes in a small spot and fits just by the water output adjustment tube.
- 9. Connect the air intake tube to the tapered plug and muffler.
Adjustments
The Bubble Magus Curve is adjusted using the water output tube, the skinny tube on the side of the skimmer.
- How to adjust the amount of bubbles
- Turn the water output tube counter clockwise to increase the bubbles
- Turn the water output tube clockwise to decrease the bubbles
Warranty & Lifetime
There is a one year warranty on the Bubble Magus. Not much to say there. Their customer service is pretty hit and miss, so be sure to call them a second time a few days later if you didn’t get satisfactory help the first try. Be friendly.
If the pump breaks and you want to replace it, it is the SP1000. Other water pumps may be able to be used in its place, but I personally have not tried this. Skimmer water pumps use a different impeller to help make the bubbles, so you would need one of these impellers for any water pump you tried.
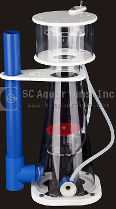
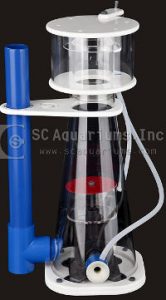
SCA Protein Skimmer
| Tank Size | Noise Level | Longevity | Price | Rating |
| up to 180 Gallons | Low | 2+ Years | Low | 7/10 |
The SCA is the budget option. It will perform about as good as the bubble magus, as this is pretty much a knock off. Still it does its job so well that I felt it deserved to be on this list.
The big differences with this skimmer will be its small body profile, a few issues and longer break in period. The 302 model has a base that’s only 9″ x 9.5″. This means despite being a high class skimmer, it can still operate in even the smallest of sumps.
The big issue I noticed with this skimmer is that it doesn’t always restart after the power goes out. This shouldn’t be too often unless you use a timer, but it is still something to keep in mind. I just have to lift mine out of the water and put it back in really quick to get it going again.
Features
- Despite the small size, the SCA protein skimmer works great for large tanks. It really gives the bigger brands a run for their money.
- The custom pump and impeller run quietly and produce great bubbles for removing skimmate.
- The laser cut parts are extremely easy to assemble.
- Just as solid feeling as its more expensive counterparts.
- An included drain valve makes keeping it running easy.
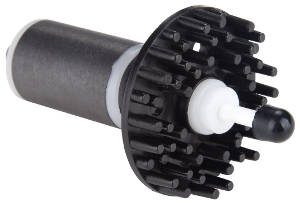
This is the type of impeller that skimmers use. They allow the skimmer to make a lot of bubbles without creating excessive stress on the motor. The grey cylinder is magnetic, so be sure not to scratch it. Most scratches will stop it from working properly.
Set-up
Setting up this skimmer is about the same as the bubble magus. The above video does an excellent job at explaining the process.
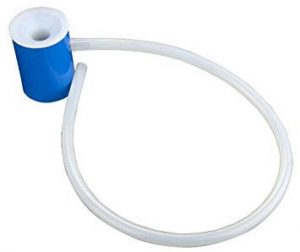
The air silencer creates a path for loose air, which would otherwise run through the skimmer and make a fair amount of noise.
Adjustments
As stated in the set up section, the SCA protein skimmer is adjusted using the small blue tube on the side of the skimmer. The adjustment tube is surrounded by markings that make it a lot easier to set and reset your skimmer
- How to adjust the amount of bubbles
- Turn the blue adjustment tube clockwise decrease the bubbles
- Turn the blue adjustment tube counter clockwise to increase the bubbles
Remember to give the skimmer a week or so to break in. It will take a few days longer than the previously mentioned skimmers, but for the price difference it can certainly be worth the wait. Just be sure that the bubbles to do not come too close to the top of the skimmer. The bubbles will fluctuate and may overflow onto the floor.
Warranty & Lifetime
This skimmer is likely to last over two years when well maintained. Mine has not made it to that age yet, however it still runs the same as it did several months ago when I first installed it. As the main thing that can break is the pump/impeller it is much cheaper to replace this rather than the skimmer. You can find the pumps on their site. The Atman PH2000 is for the 302 version. There is usually a sale on this pump, meaning it only costs a fourth or third of the price of a whole new skimmer.
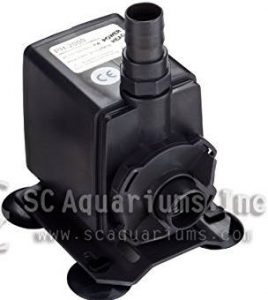
The pump is fairly bulky outside of the skimmer. Be sure to clean the impeller by twisting off the face plate shown in the picture.
Other Great Skimmers
The previously shown skimmers are what I consider to be the best of the best. However their prices can be a bit daunting. The following skimmers are lighter on the budget and make for good entry level skimmers.
Lee’s Counter Current
| Model | Tank Size | Height | Price |
| Small | 30 gallon | 12.06 inches | Very Low |
| Medium | 50 gallons | 16.13 inches | Very Low |
| Large | 90 gallons | 23.13 inches | Very Low |
Lee’s protein skimmer is inexpensive, effective, and available in models to suit 3 different tank sizes. These larger the tank size, the taller the protein skimmer will be. Be sure to check that the Lee’s protein skimmer will fit in your aquarium or sump:
All the models have a 3 inch diameter
Small: Up to 30 gallons. Height capacity is 12.06 inches.
Medium: Up to 50 gallons. Height capacity is 16.13 inches.
Large: Up to 90 gallons. Height capacity is 23.13 inches.
Setup
Lee’s protein skimmer comes preassembled and equipped with fitting airline tubing, two way valves for flow adjustment, and suction cups. The only needed piece of equipment that does not come with this protein skimmer is a fairly powerful air pump with 2 outlets, or 2 single outlet air pumps.
The product is cheap only because the material is plastic. This means that parts can come apart fairly easy by touching or by high flow in your aquarium. A quick fix to this is to use reef-safe super glue and glue the base of the unit to the body, the airline tubing to the body, and the suction cups to the plastic arms they are attached to.
Firstly to setup, attach the parts and suction cups and position the protein skimmer in your tank so that the collection cup is above water level. Suction cup the protein skimmer to your tank wall. A good position is often in the corner of your tank where you might have heaters or filters already.
Next, you must adjust the bubble flow of the protein skimmer to collect toxins in your aquarium water. Connect the airline tubing from the protein skimmer to your air pump with 2 outlets or 2 air pumps with 1 outlet. Attach the air valves to the two airline tubing lines going to each of the 2 air pump outlets. Close both valves completely so no bubbles flow. Now, adjust the line marked “adjust first” gradually to a higher bubble output until you see bubbles coming up the airline tubing about 1/4 to 1/2 inch apart. Next, gradually adjust the second airline tubing with the valve until the bubble foam rises approximately 1/2 inch past your tank’s waterline in the collection cup. Over the next few days, watch your protein skimmer skim, or slightly adjust the bubble output as needed.
Maintenance
Maintenance to your Lee’s protein skimmer is very easy. When you see your collection cup full of gunk, slide your protein skimmer collection cup fully above your water line so that nothing caught goes back into your tank. Pull the collection cup off the body of the protein skimmer and rinse it in your sink. Put the collection cup back on the protein skimmer and position it so that the collection cup is at the tank’s waterline again.
Once per month you should change the wood air block so that the bubbles stay productive. Alternatively you could purchase a ceramic, higher quality airstone that will last months.
Coralife Super
The Coralife Super protein skimmer is fairly inexpensive and offers very good needle-wheel skimming and quality for its price. For an aquarium beginner, this protein skimmer is a great entry-way to try protein skimmers out and see what they can do for your aquarium before committing a lot of money on a higher-tech one.
Setup
The Coralife Super protein skimmer comes in 3 tank sizes: 65 gallons, 125 gallons, and 220 gallons. The protein skimmers come with a 528 GPH water pump, along with all necessary tubing and parts for this protein skimmer to run. Although for the larger models, the water pump that comes with the protein skimmer may not be strong enough, so you may need to purchase a water pump that pumps water at 650 GPH to 750 GPH for the skimmer to work more effectively. The protein skimmers can be used hang-on-back of your aquarium, or hung on your sump with its mounting bracket. The mounting bracket will take two 1.25 inch holes in your aquarium canopy if you are hanging this protein skimmer on your aquarium. Of course with positioning dimensions of the item are important to know how much wall space you need in order to operate the protein skimmer. The dimensions of the Coralife Super protein skimmers are:
- 65 gal: 4.2″ x 5.5″ x 20.8″
- 125 gal: 5″ x 7.2″ x 24.5″
- 220 gal: 6″ x 8″ x 25.5″
Setting up the Coralife Super
To assemble the protein skimmer, refer to the picture on the manual and accordingly put together the parts. Now, hang the protein skimmer on the back of your aquarium or sump. Attach airline tubing from the chamber intake(bottom) of the protein skimmer hole to your water pump that is in the water. Attach output tubing onto the water output with the vent hole facing up. If you have the 65 gallon model that comes with the micro bubble diffuser, attach this onto your aquarium so that the output tube flows water through this before it goes back into your tank. Position the bubble diffuser so that the top of it is 1/4 inch above your tank water line. If you have the 125 gallons or 220 gallons model you may choose to attach tubing from the drain output in the collection cup to a large bucket or container so that you do not have to unscrew and empty the collection cup every day.
To begin operation, make sure all tubes, parts, and mounts are tightened. Turn the water-adjustment dial to the open position. Now, plugin the water pump and adjust the water-level adjustment dial until micro-bubbles are just below the collection cup opening cone. For the 65 gallons model you may need to use the flow control valve for coarser adjustment and the adjustment dial for finer adjustment. Leave the protein skimmer and pump running for 72 hours to break in the protein skimmer. During this time you will probably have micro bubbles in your tank, but within a few days they will go away.
For dry skimming operation, adjust bubbles to rise to 1/4 inch to 3/4 inch inside the collection cup cone. This will produce dry foam.
For wet skimming operation, adjust bubbles to 3/4 inch to 3 inch high inside the collection cup. This will produce a sludgier output.
Maintenance
If you have the 125 gallons or the 220 gallons model you may choose to make maintenance easier by connecting tubing from the collection cup drain to a large container that you would only have to empty once per week instead of changing the collection cup daily. However, if you do not want to do that or have the 65 gallon model and cannot, just unscrew the collection cup above water with the water pump unplugged once per day, and empty the collection cup and then screw it back in place and plug the unit back in.
You should clean out the skimmer once every 1-3 months. Focus your efforts on the tubes, water pump and collection cup. The water pump is the only component that can break, so be sure to give it special attention. Likewise if the tubes become clogged and you are no longer able to clean them
Once per month you may need to change the filter pads in the bubble diffuser if you use it.
