View On Amazon
| Model | Tank Size | Height | Price |
| Small | 30 gallon | 12.06 inches | Very Low |
| Medium | 50 gallons | 16.13 inches | Very Low |
| Large | 90 gallons | 23.13 inches | Very Low |
Overview
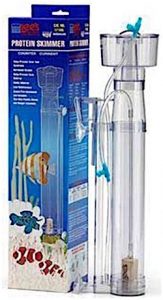
Lee’s counter current protein skimmer is the perfect protein skimmer for new aquarists and aquarists on budgets because it offers high performance at a low cost.
Lee’s counter current protein skimmer comes with almost all necessary equipment to setup: suction cups, on-tank hangar, airline tubing, one 2 inch limewood air stone, and two adjustable air valves. However, a needed air pump does not come included. You will need to get either one strong air pump with two air holes, or two moderately strong air pumps with one air hole. I recommend using only one air pump because noise level will be lower.
Pros
-
- Inexpensive
-
- Easy to setup
-
- No in-tank water pump required
- Works effectively
Cons
-
- Made of low-grade plastic
-
- Does not come with needed air pump
-
- Must change air stone occasionally
- No collection cup drainage hole
Setting Up Your Lee’s Counter Current Protein Skimmer
Lee’s counter current protein skimmer is easy to setup. The protein skimmer comes presassembled with the limestone air stone in place. All that is needed is to attach airline tubing from your air pump(s) to the protein skimmer, and to place the protein skimmer in your tank. Place the air pump(s) somewhere where they will make the least noise: in your aquarium cabinet, or in a different room by using a longer piece of airline tubing.Follow these steps to setup your Lee’s counter current protein skimmer:
A. Attach first piece of airline tubing from air pump to airline connector at the base of the protein skimmer. This will be known as “airline A” for reference, and “air valve A” is attached.
B. Attach second piece of airline tubing from air pump to limestone air stone. This will be known as “airline B” for reference, and “air valve B” is attached.
C. Attach your Lee’s counter current protein skimmer to your tank using the suction cups, on-tank hangar, or both. A great place for equipment in your tank is in the corner. Position the collection cup so that it is approximately 5 inches out of the water.
Note: If you are placing this in an aquarium with a canopy, you may need to cut a hole for the protein skimmer to fit.
D. Plugin your air pump.
E. Turn both air valves completely closed so no air can escape.
F. Air valve A controls the downward flow of water. Turn air valve A very slowly, opening the air valve until you see bubbles rising about 1/4 inch to 1/2 inch apart in the return tube.
G. Air valve B controls the upward flow of bubbles through the limewood air stone. Turn air valve B very slowly, opening the air valve until you see bubble foam reaching the bottom of the collection cup.
H. This concludes the setup. For the first few days you may not see much foam in the collection cup. After roughly a week when the protein skimmer gets broken in more, you will start to see more foam in the colors of green to black. This means your Lee’s counter current protein skimmer is catching wastes in your water very effectively.
If you need more assistance setting the Lee’s counter current protein skimmer up, refer to the video below.
Maintenance
The collection cup will fill up with green and black foam every few days. When the collection cup is full you will need to gently remove the collection cup from the protein skimmer body and rinse it out in the sink. Take care not to spill the removed waste back into your aquarium.
The limewood air stone that comes included with the purchase of the protein skimmer will wear out within approximately one month. You can tell it is wore out when your Lee’s counter current protein skimmer starts producing way too much foam , because the aged air stone is producing too large of bubbles. To replace the worn limewood air stone, you can purchase new Lee’s limewood air stones, or you can purchase a ceramic air stone and bake it so that it will last for months.
Watch for salt deposits in the tubing. Salt deposits may clog the airline tubing so that bubbles cannot effectively be produced. If you see a salt deposit, unplug the system and either use a toothpick or rinse the airline tubing out to remove the salt.